Author Topic: Amateur Linenbacking 101 by Pulpfixin  (Read 209352 times)

Charlie

  • Guest
Re: Amatuer Linenbacking 101 by Pulpfixin
« Reply #50 on: April 07, 2012, 10:38:45 AM »
Impressive Charlie (and I really like the drain you added) - I think I own a couple screwdrivers but that's about it  :-[

Well I am pretty lucky having all the tools to do this.  I've been restoring furniture since high school.  The oak table in the pic is one that my grandmother had on the back porch that came out of a school library; the school shut down in the late 50s. It was very rough and I spent weeks bringing it back to life...  I was thinking yesterday that without the culmination of what I've done in the past and having all the tools, this would be a monumental effort.  I could only imagine the cost and steep learning curve for someone starting from scratch.   

Well off to make the canvas frames.  I viewed some of Darios frames and he appeared to use about 2.5" to 3" of overlap on the Jane Russel OS...  That probably is enough to do an Argentinian too...  I am going to try to make one with something called pocket screws.  He used brackets and I picked some of those up, but if I can get the pocket screws to work then there will be nothing to get a poster snagged on etc...   I'll report back... One problem I've been having is the freakin Masters is on and I get distracted...

Charlie

  • Guest
Re: Amatuer Linenbacking 101 by Pulpfixin
« Reply #51 on: April 07, 2012, 10:44:17 AM »
:o
Good grief.  Your wife must love you!  Imagine all those little handyman jobs that always need to be done.
At least in your house there is half a chance they do actually get done!

Very impressed!

Yes and no.  Just imagine all the little extra projects lying around the house like a half restored oak chair the mahogany buffet project taking up a corner of the garage. The linenbacking station taking up the dining room....   ;D  I do have a problem with finishing the extra projects.  In the old house I replaced a window in our master bath a few years ago and only finished the molding just a few weeks ago when we had to rent it.  I am very particular about the solution/method/style to finishing the project.  I couldn't quite wrap my mind around how I wanted to finish the window off, so it sat.  I just contractor finished it for the renters...  If it's not going to make you smile every time you look at it there is no point to doing it...


Charlie

  • Guest
Re: Amatuer Linenbacking 101 by Pulpfixin
« Reply #52 on: April 07, 2012, 11:17:21 AM »
Holy Crap!  FedEx just dropped off all my supplies... This may actually happen.   :o 

And I have to go to Grandma's for Easter. Typical timing... 

Offline brude

  • Post-aholic
  • **********
  • Posts: 13565
Re: Amatuer Linenbacking 101 by Pulpfixin
« Reply #53 on: April 07, 2012, 11:34:38 AM »
I was always too creative for real, long-lasting repair...

  Great job, Charlie!  clap clap clap

Charlie

  • Guest
Re: Amatuer Linenbacking 101 by Pulpfixin
« Reply #54 on: April 07, 2012, 04:40:35 PM »
Phase 1, Step 2 - Frames for Canvas

Made frames for canvases this morning.  Here you can see a trick I use to make sure all sides are exactly the same.  If you screw the boards together and then cut them they are the exact same length...


Trimmed them to 2.5 inches wide to reduce weight. The orange thing is a feather board it keeps the wood against the rail and also prevents it from shooting back out at you if it gets away. That is the mahogany buffet the boards are leaning on that I mentioned earlier...  Family heirloom left in a barn; thanks dad...


This is a Kreg Pocket Screw System.  It hides the connection out of sight.  They also make hardwood plugs to conceal the screw.


Finished frame and closeup of pocket screws


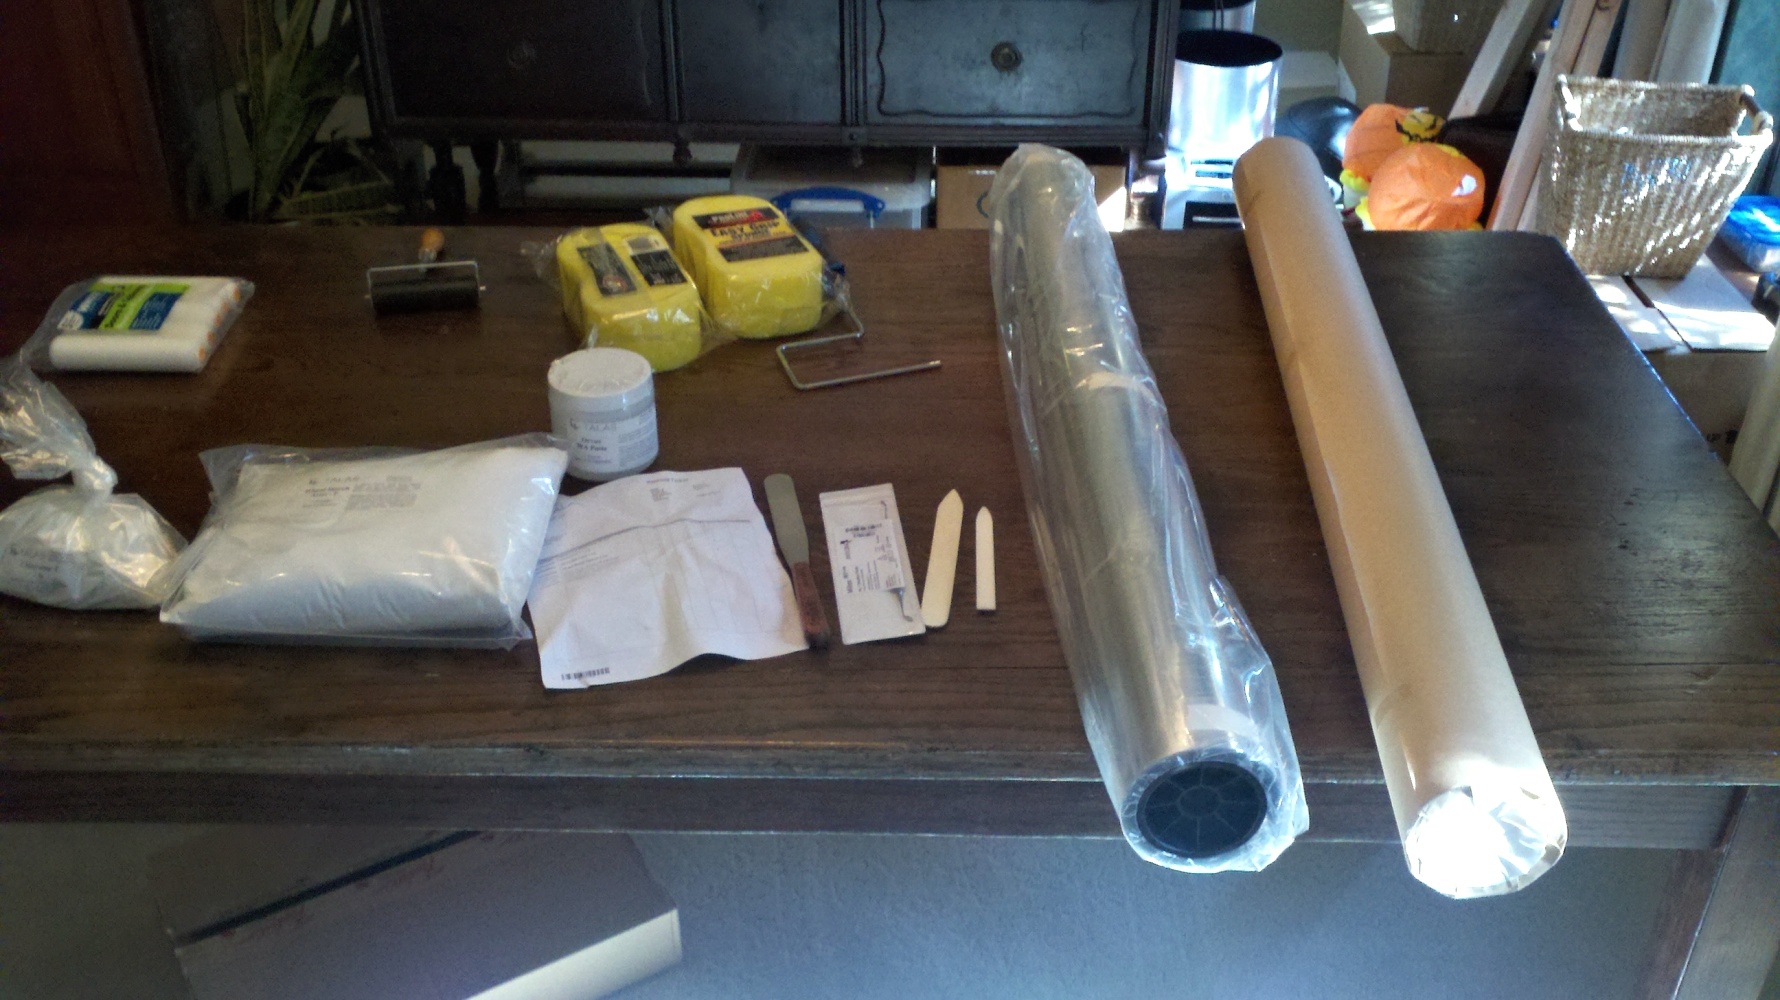
Phase 2 (or whatever at this point) supplies and putting it all together...


Supplies


Frame on canvas ready for stretching.  Stretching was actually the hardest part so far.  It was a bitch and my fingers hurt for an hour afterwards...


Stretched; Dario told me a while back (the first time I thought about this) to run a wet sponge over it to tighten it up.  It worked very well..


Masa paper laid out.  The back was shiny, I thought it would be the same texture front and back.  Huh?


Candidate for backing? Strange Bedfellows I have 10 copies so I won't miss one if it goes badly.  I also played with the mylar sheets etc.  But now time for Easter, so maybe Sunday night or Monday I can actually get a poster wet...


Pulpfixin Out!

Offline Zorba

  • Curator
  • *****
  • Posts: 6024
  • Lets dance!
Re: Amatuer Linenbacking 101 by Pulpfixin
« Reply #55 on: April 07, 2012, 04:47:44 PM »
I love how much you love this stuff.

I always feel less crazy after reading some of your posts.  :P

Go Charlie Go!!!

Offline brude

  • Post-aholic
  • **********
  • Posts: 13565
Re: Amatuer Linenbacking 101 by Pulpfixin
« Reply #56 on: April 07, 2012, 04:53:34 PM »
I am amazed at the speed of assembly and the thorough documentation.
Have a great Easter, Charlie!
 cheers

Offline Silhouette

  • Hoarder
  • ****
  • Posts: 3866
Re: Amatuer Linenbacking 101 by Pulpfixin
« Reply #57 on: April 07, 2012, 05:12:14 PM »
Phase 1, Step 2 - Frames for Canvas

Frame on canvas ready for stretching.  Stretching was actually the hardest part so far.  It was a bitch and my fingers hurt for an hour afterwards...


Pulpfixin Out!


Given you are gong to cut the canvas off the frame once finished I wonder why there isn't something like a metal frame that you can size to suit (the canvas), then clamp the canvas in place and wind the frame wider to stretch tight..

Keep up the good work Charlie
David


Offline erik1925

  • Post-aholic
  • **********
  • Posts: 20330
Re: Amatuer Linenbacking 101 by Pulpfixin
« Reply #58 on: April 07, 2012, 05:57:24 PM »
Charlie, just curious why or how you would own 10 copies of Strange Bedfellows?

And the set up and progress all look fantastic, too!

Nice job, so far.
 thumbup


-Jeff

Offline CSM

  • Post-aholic
  • **********
  • Posts: 12567
Re: Amatuer Linenbacking 101 by Pulpfixin
« Reply #59 on: April 07, 2012, 10:13:00 PM »
I hope you will post such detailed pics of the actual linenbacking process!  Please?

(Especially if it goes terribly wrong ;) )
Chris

Offline 50s

  • Curator
  • *****
  • Posts: 5630
  • Steve
Re: Amatuer Linenbacking 101 by Pulpfixin
« Reply #60 on: April 08, 2012, 02:57:32 AM »
Given you are gong to cut the canvas off the frame once finished I wonder why there isn't something like a metal frame that you can size to suit (the canvas), then clamp the canvas in place and wind the frame wider to stretch tight..

I think the idea is to tighten up the linen fibers making it more rigid once cut down, rather than stretching it so it becomes a saggy sock once cut down, interested to be enlightened though


Offline Neo

  • Hoarder
  • ****
  • Posts: 4382
    • My photobucket
Re: Amatuer Linenbacking 101 by Pulpfixin
« Reply #61 on: April 08, 2012, 10:05:13 PM »
Excellent work, Charlie.  Hopefully the backing process will go as well as setting up everything.  Good luck.  thumbup

Offline Ari

  • Curator
  • *****
  • Posts: 8495
    • OFFALEATERS HOUSE OF THE DAMNED
Re: Amatuer Linenbacking 101 by Pulpfixin
« Reply #62 on: April 08, 2012, 10:17:49 PM »
if you cant get the hang of it, flog your set up off to posterfix ;)
An Error Has Occurred!
You can't report your own post to the moderator, that doesn't make sense!

Charlie

  • Guest
Re: Amatuer Linenbacking 101 by Pulpfixin
« Reply #63 on: April 08, 2012, 10:26:10 PM »
Well it is done...  It was not a complete success and not a complete failure.  I backed the poster along with the stains that didn't come out...  I may have expected too much.  The one thing I was very surprised about was how tough the poster was.  I really expected a wet poster to be much more fragile...

Here are the pre-backed photos.  Notice the stains. I specifically picked one with stains. These may be ink stains or something else because some came out and some didn't.  


My wife was in charge of taking pics and she failed miserably...

First I wetted down the poster.  I used distilled water but I am not so sure this matters now...  


I used the orvus to wash the poster.  I washed it twice and rinsed it twice.  I then used a detergent (like bleach) to soak the poster and made the CaCO3 bath (sorry no photos)  I did have failures in my water collection system so my wife was running around putting towels down every where.  We had a tarp down so nothing serious.  I then washed the CT off three times and soaked it in the CaCO3.  I think I put way too much CaCO3 so I will have to revise that.  

When I put the Masa down we didn't strain the wheat paste well enough and there were lumps that I painstakingly tried to remove best I could.  After straining it for the poster it went down no problem like a pro...  The poster does look much brighter and cleaner.  Just not sure if I could have done more for the stains.  I will also have to see how well the masa adhered with the lumps...  Overall just need to do a few more to get the hang of the basics.  The stain removal was a downer..  So many variable soaking time etc...

So Dario any tips in the stain department would be much appreciated!


« Last Edit: April 08, 2012, 10:26:42 PM by Charlie »

Offline CSM

  • Post-aholic
  • **********
  • Posts: 12567
Re: Amatuer Linenbacking 101 by Pulpfixin
« Reply #64 on: April 08, 2012, 10:30:35 PM »
I would say not bad for a first try!

I can't really tell from the pics -has your backing job done away with most of the wrinkling and folds?
Chris

Charlie

  • Guest
Re: Amatuer Linenbacking 101 by Pulpfixin
« Reply #65 on: April 08, 2012, 10:33:07 PM »
I would say not bad for a first try!

I can't really tell from the pics -has your backing job done away with most of the wrinkling and folds?

Yeah the backing I would say was very much a success.  You can still make out the folds but they are pretty much gone in terms of texture.  I also used a teflon burnishing tool to smooth them out....  I take some picks of the folds...
« Last Edit: April 08, 2012, 10:33:24 PM by Charlie »

Offline Neo

  • Hoarder
  • ****
  • Posts: 4382
    • My photobucket
Re: Amatuer Linenbacking 101 by Pulpfixin
« Reply #66 on: April 08, 2012, 10:36:51 PM »
Looks like a pretty darn good job, especially considering it was the first.  thumbup

Charlie

  • Guest
Re: Amatuer Linenbacking 101 by Pulpfixin
« Reply #67 on: April 08, 2012, 10:48:29 PM »
I can't really tell from the pics -has your backing job done away with most of the wrinkling and folds?


Offline CSM

  • Post-aholic
  • **********
  • Posts: 12567
Re: Amatuer Linenbacking 101 by Pulpfixin
« Reply #68 on: April 08, 2012, 11:18:28 PM »
Impressive Charlie!
Chris

Offline erik1925

  • Post-aholic
  • **********
  • Posts: 20330
Re: Amatuer Linenbacking 101 by Pulpfixin
« Reply #69 on: April 08, 2012, 11:42:13 PM »
Good job charlie. And nice set of progress pix, that accompanied your work, too!  thumbup


-Jeff

Matt

  • Guest
Re: Amatuer Linenbacking 101 by Pulpfixin
« Reply #70 on: April 09, 2012, 12:29:54 AM »
Top job!!! 8)

How much do you charge?

Charlie

  • Guest
Re: Amatuer Linenbacking 101 by Pulpfixin
« Reply #71 on: April 09, 2012, 03:28:05 PM »
Top job!!! 8)

How much do you charge?

No plans for this yet; but I can't deny thinking about it.  But we could have some fun, if you like to gamble; send me a candidate for a free LB job (like a haircut from a beauty college)...  But no guarantees.    :D

Offline Mondo Hazardo

  • Collector
  • ***
  • Posts: 598
    • MOVIE★INK. AMSTERDAM
Re: Amatuer Linenbacking 101 by Pulpfixin
« Reply #72 on: April 09, 2012, 05:05:45 PM »
Wow, so happy you show us your zeal and determination and envious of your handyman skills. Unfortunately i have two left and slightly shaky hands.

Charlie

  • Guest
Re: Amatuer Linenbacking 101 by Pulpfixin
« Reply #73 on: April 09, 2012, 11:36:20 PM »
Strange Bedfellows cut down and trimmed...


Second attempt went way better. Heartbreak Ridge OS...

I am starting to see similar texture that I've seen on professional stuff. It may just be the modern paper is thinner...  I figure on this one all I need is a black, grey, white and red watercolor pencil and resto complete...  Burnishing after drying really dulls the folds which will be a must on this one.  This paper was much more delicate when wet unlike the first one from the 60s.  Once when lifting it to reposition, it actually tore; but no matter it went right back together...


Anybody have any questions or requests?
« Last Edit: April 09, 2012, 11:36:57 PM by Charlie »

Offline CSM

  • Post-aholic
  • **********
  • Posts: 12567
Re: Amatuer Linenbacking 101 by Pulpfixin
« Reply #74 on: April 09, 2012, 11:40:38 PM »
Charlie - I want to see you tackle some actual restoration now (yeah, I know we are moving quick!).

Let's see how the colouring goes on the fold lines?
Chris